
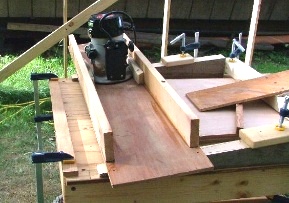


Making the Join (after cutting the scarfs)
First make sure your table is flat and all dust shavings are well brushed off. The area directly under where the scarfs will be, must be solid, smooth and flat. Then place the panels to be bonded on the table so that the scarfs correctly overlap. When the first one is down (feather edge down on the table), make sure it is aligned to the center line on the table and then pin down the end away from the scarf to the table with a very small brad or pin. This is to make sure that pressure on the beveled scarf joint, does not push the piece away.
Now place a strip of waxed paper (about 75 mm (3") wide) under the scarf area to prevent any excess epoxy from bonding the parts to the table. Now test fit the mating layer of ply (feather edge now on the top) to the part on the table. Carefully align this part also to the centerline on the table. Then place a short straight edge (like a steel rule) over the top surface and make sure it's touching both parts, as it will when they are the right distance apart. Now pin down the other end of the top piece, so you know how they must fit together.
Before going further, let's make sure we have the parts we need to hold this joint down.
We need two 6" clamps to go over the edge of the table.
We need two small spacers (about 75 x 75), the same thickness as the plywood being scarfed and we need a clamping bar to reach across the table.
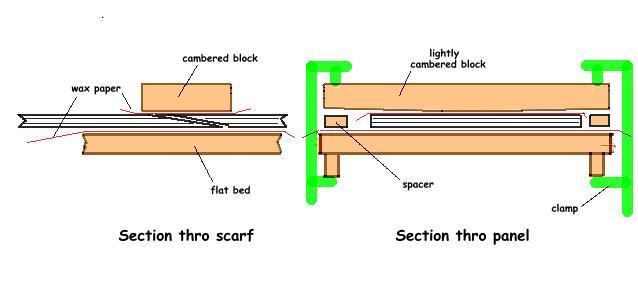
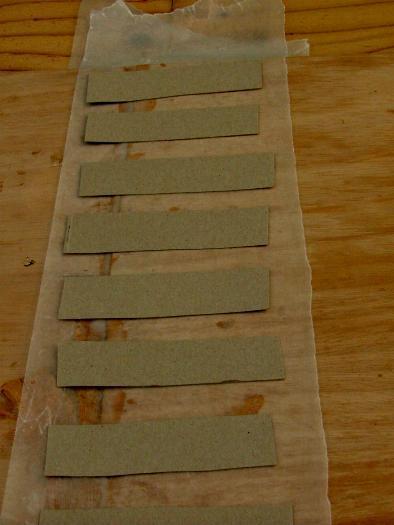
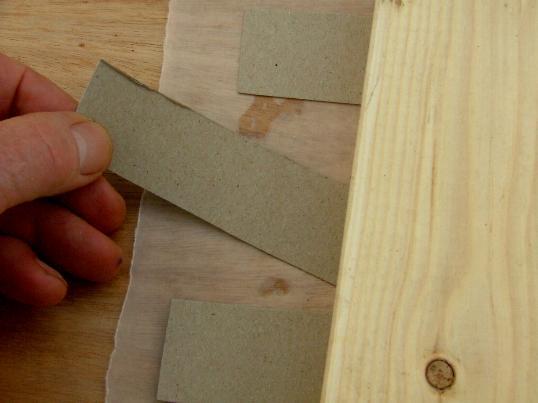
In order to also apply adequate pressure to the middle area of the scarf, the clamping bar will either need to be slightly pre-cambered to compensate for it bending—or one can apply pressure to the middle of the bar, by adding another one diagonally across it as explained later. You will also need about 10 thin card strips, each about 100 x 20 to judge joint pressure. With some wax paper and epoxy, you're set to go.
[As a starting point, I find a small camber of 0.5 to 1 mm over the 600 mm (24") length of the clamping bar to generally work well but it will depend on the wood used.]
Now mix up a relatively small amount of epoxy and add a filler (like WEST SYSTEM® #404) to make a mix somewhere between mayonnaise and peanut butter—just thick enough to not run of its own weight. Apply a moderately thin coat to both contact surfaces of the scarf and lay in place, with the two parts pinned at their ends to not slide apart. If you apply too much epoxy, it will just squeeze out and really mess up your plywood surfaces. (I find that one squirt of resin and hardener from a WEST pump will easily do two scarfs about 18" long, once the filler is added.)
Then add another layer of wax paper and then a number of your prepared cardboard strips—enough to place them 35 mm apart across the joint.
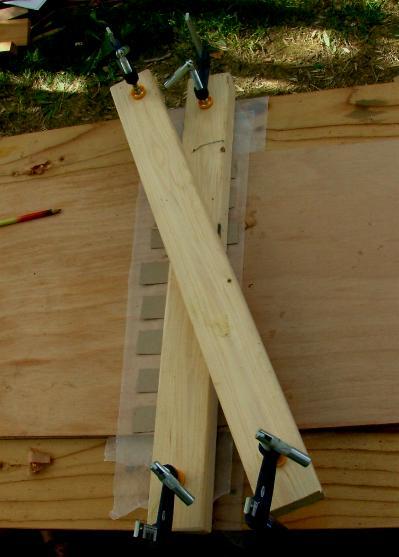
Place the lightly cambered bar on top and now place the 2 spacers you have plus one card strip, directly under the ends of the bar, directly in line with the clamps. Now slightly tighten the clamps at each end equally, making sure that they are on a line down the center of the scarfed joint.
 As you tighten the clamps, pull gently on each of the card strips in turn to see if one or more remains loose. If so, you can either adjust the camber on the bar by removing a shaving or two where it was too tight, or you can add an auxiliary bar to add more local pressure where the card could be easily pulled out.
You should not need to tighten the clamps very hard. They will anyway firm up on the spacers you added—something that is needed to prevent the bar from bending down at the ends, giving not only too much pressure there but also lifting the bar too much in the center. I find that adequate pressure is obtained when I cannot easily pull out the card, but that I can still just pivot it sideways.
You can add one other identical panel to be joined, on top of the first one with wax paper in between, but I do not recommend to stack up more than two joints at any one time. You just cannot see what's going on in there and if one joint is not good, parts may have to be scrapped.
Keep in mind when doing two joints, that the side spacers will also need to be doubled.
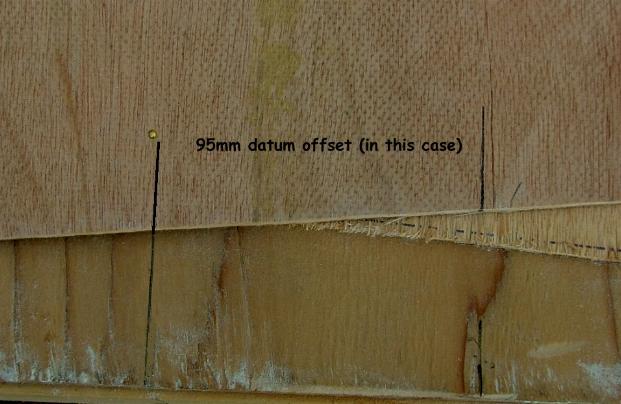 Also, when you add the second sheet, you still need to have the scarf joint directly over the old one. This will mean that for the second sheet (which is handed for P&S), you'll need to offset the datum line by a parallel amount. Eg: I found that 95 mm offset worked fine for the second ama side, once flipped over.
Once cured, the joints can be inspected. It's normal that a little epoxy has squeezed out and run over the plywood. The joint can be cleaned up with a sharp plane (if not quite fully cured) or a sander (when really hard) and once it's sheathed and/or coated with epoxy, it will show less anyway.
Use the result from your first scarf joints to judge whether you need to make adjustments in pressure, epoxy thickness, viscosity, or placing of your panels. Practice makes perfect after all ;-)
Read more Construction Tips & Techniques.
"New articles, comments and references will be added periodically as new questions are answered and other info comes in relative to this subject, so you're invited to revisit and participate." —webmaster
"See the Copyright Information & Legal Disclaimer page for copyright info and use of ANY part of this text or article"