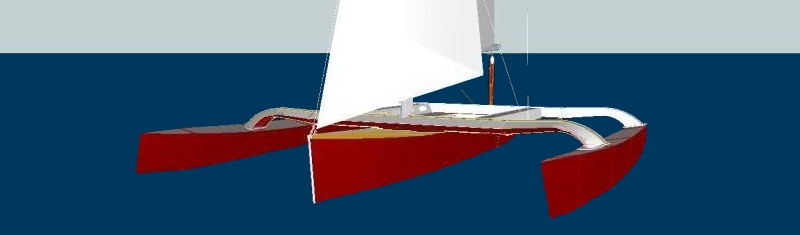


W17 HATCHES
It’s been a while since I promised my latest thoughts on deck hatches. So what is the best access to the relatively volumous compartments both forward and aft of the W17 cockpit ? After 10 years of experimenting, here are my recommendations..
First, a sketch plan of the W17 decks, and where the hatches will be. (The toilet hatch will be explained in a Cruising article)
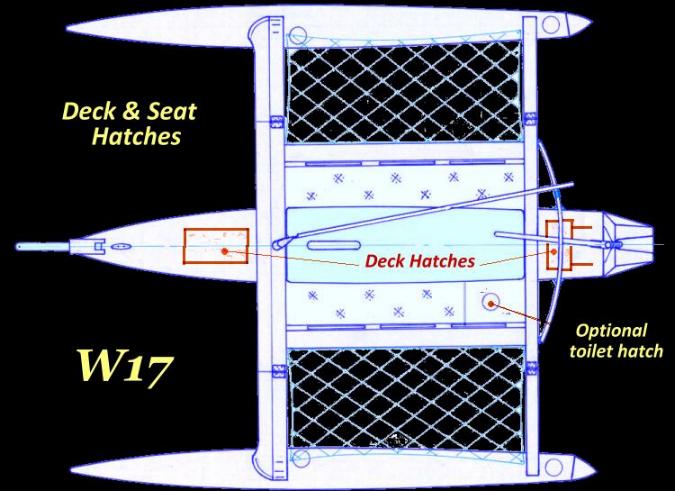
Both compartments are each best reached by two hatches, one in the cockpit bulkhead and the main one via the deck.
Both bulkhead accesses are limited by beam framing, plus there needs to be a coaming to prevent cockpit water slop from entering. I suggest 50-60mm coaming height at the rear and 40-45 up forward where slop is less and freeboard is more; plus the forward cover can mostly stay in place while sailing.
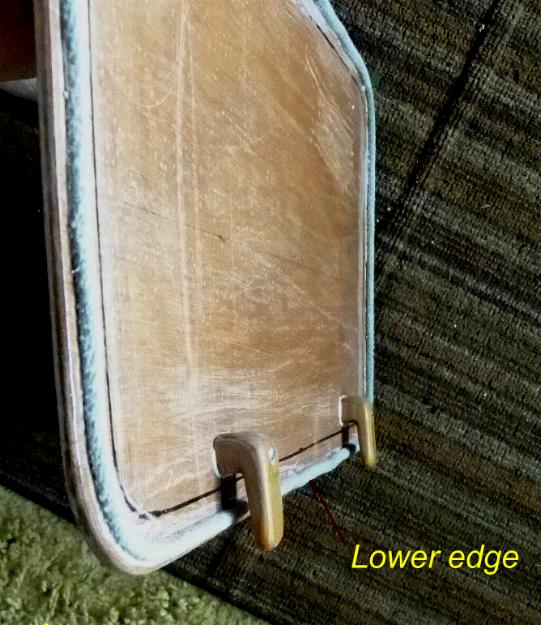 Let’s start with this forward bulkhead hatch. A light and inexpensive way of sealing this bulkhead hatch is to bond a somewhat compressible rope around the lapped edge of a plain, unframed plywood cover. Choose a rope that is a little absorbent and will swell up when wet. I used a 3/8” braided cotton and it’s still working fine after multiple seasons.
The hatch has two wood hooks at the bottom to ‘wedge engage’ with the coaming and is then pushed against the bulkhead, with two wood toggles (cut with a slight back surface taper) to apply a little compression on the rope near the top corners. Its quick and convenient. A small exterior grip could be bonded on the face if deemed preferable. 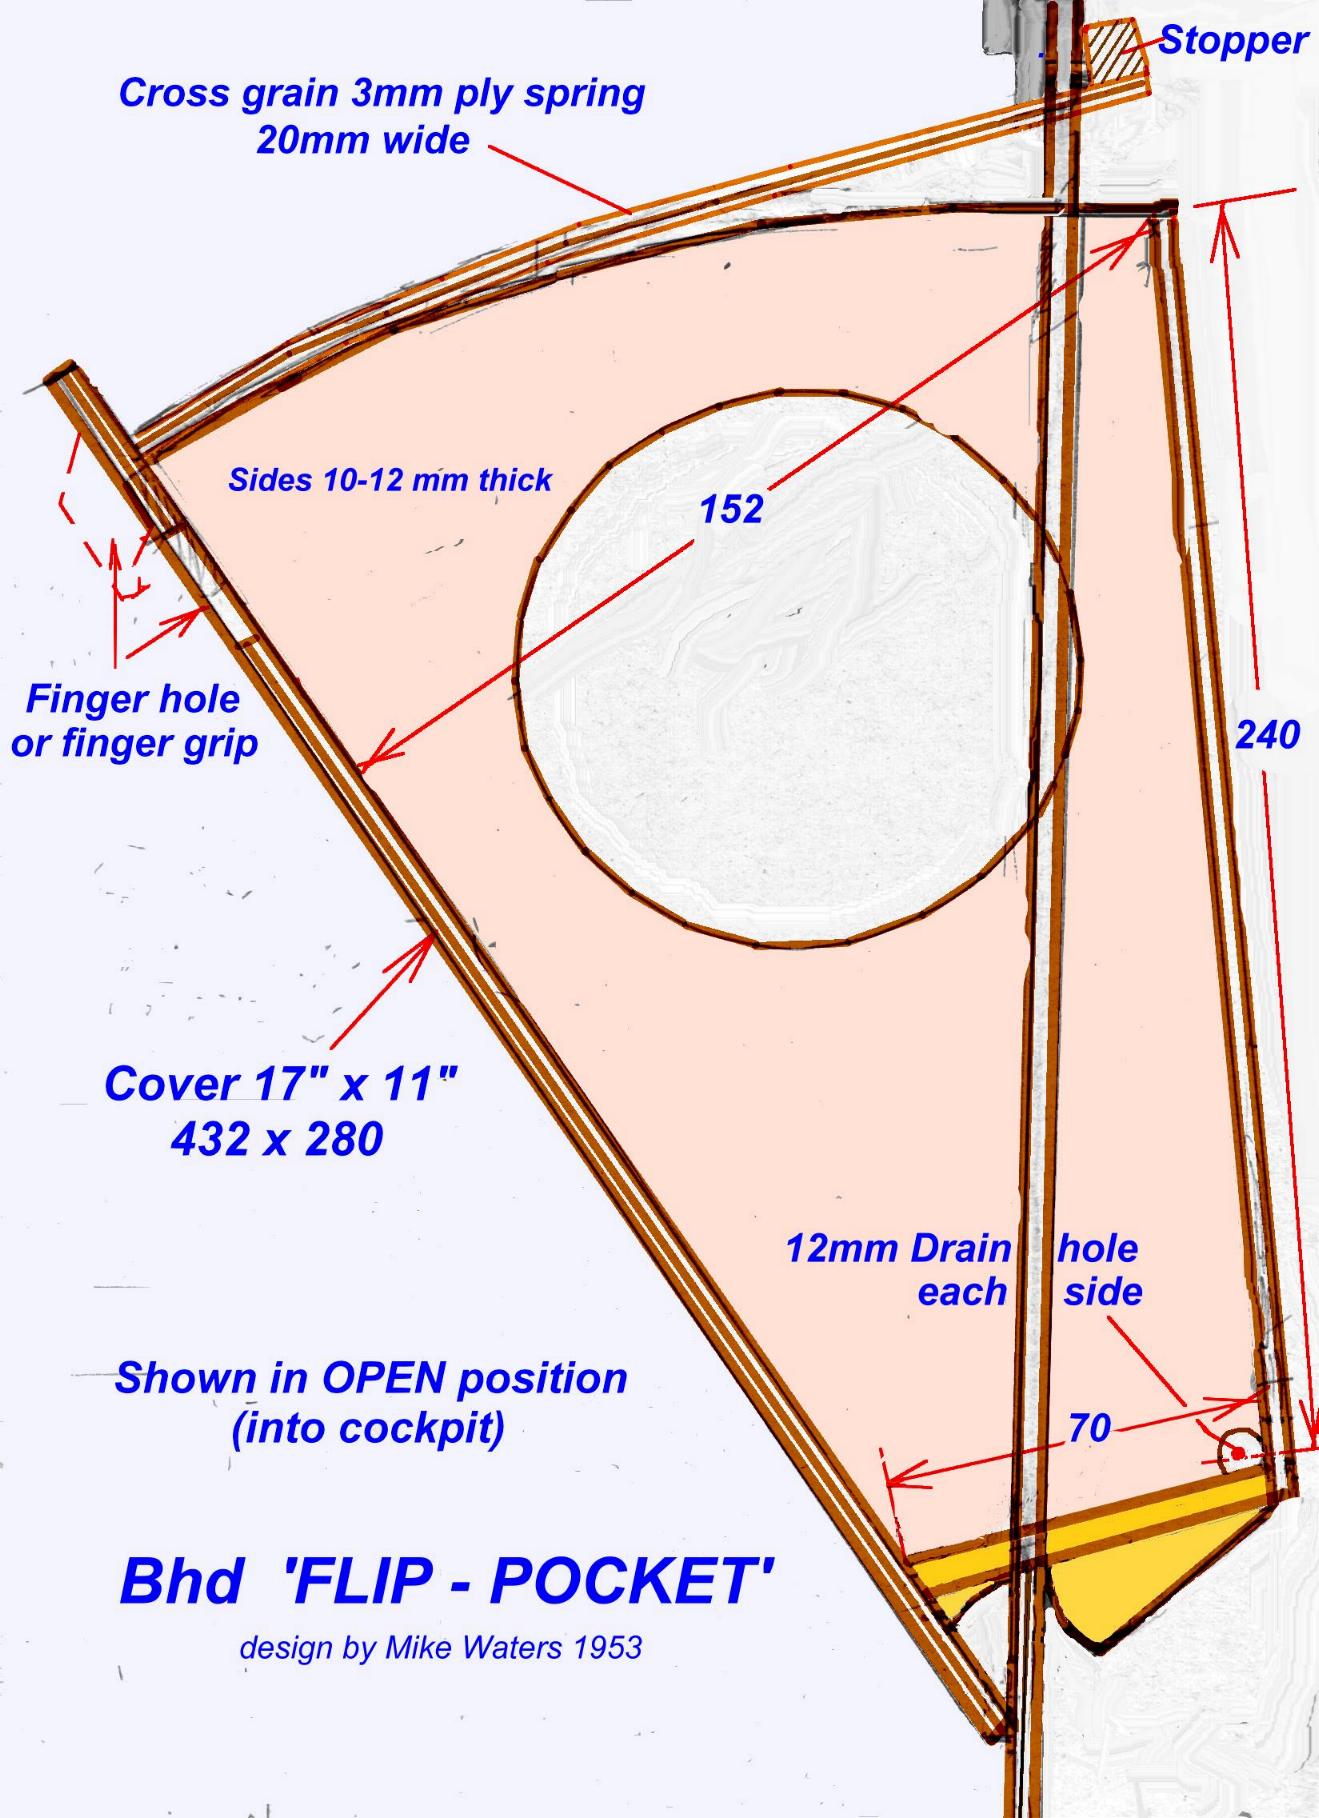
At the aft bulkhead, I highly recommend my Flip-Pocket hatch cover that I first created way back in 1953 for my Mk.ll Flying Moth. It proved so useful that ‘Magic’ is the 4th boat I’ve installed one on, and I’m sure you will also find it very convenient and practical.
The plain hatch cover has a small box pocket on its inside face with small wood ‘feet’ at the base to allow the pocket to pivot out about 145mm at the top. The whole assembly cannot fall out due to two ‘plywood springs’ that have stoppers glued to their ends. These springs are bonded for 50mm, to the top of the box end plates. To totally remove the pocket, you simply depress the springs with your thumbs and then lift out the whole unit. If you cut a hand hold in the back ply, it serves as a handle if you need to carry it ashore. It’s a great place to keep your phone, Go-Pro, sunglasses and anything special that you may need to locate quickly at some point, yet needs to stay dry.. Once flipped close, the hatch stays closed automatically as its center of gravity is now to the rear of its crude hinge, so with just ‘a Flip to the rear'', it stays closed at all times with no need for retainers.
Here is a sketch with dimensions that match my own unit.
I personally have never felt the need for this to be totally watertight as when closed, it's tucked well under the aft beam and my coaming is high enough to have never allowed overflow. But IF I were making a large voyage at sea when a large breaking crest could potentially pass over the whole boat and dump enough water to possibly overflow the coaming and therefore take a minute or two to drain out, I’d use the same cotton rope gasket as up forward and add two retaining toggles at the upper sides.to add a little rope compression.
.
Now to the Deck Hatches.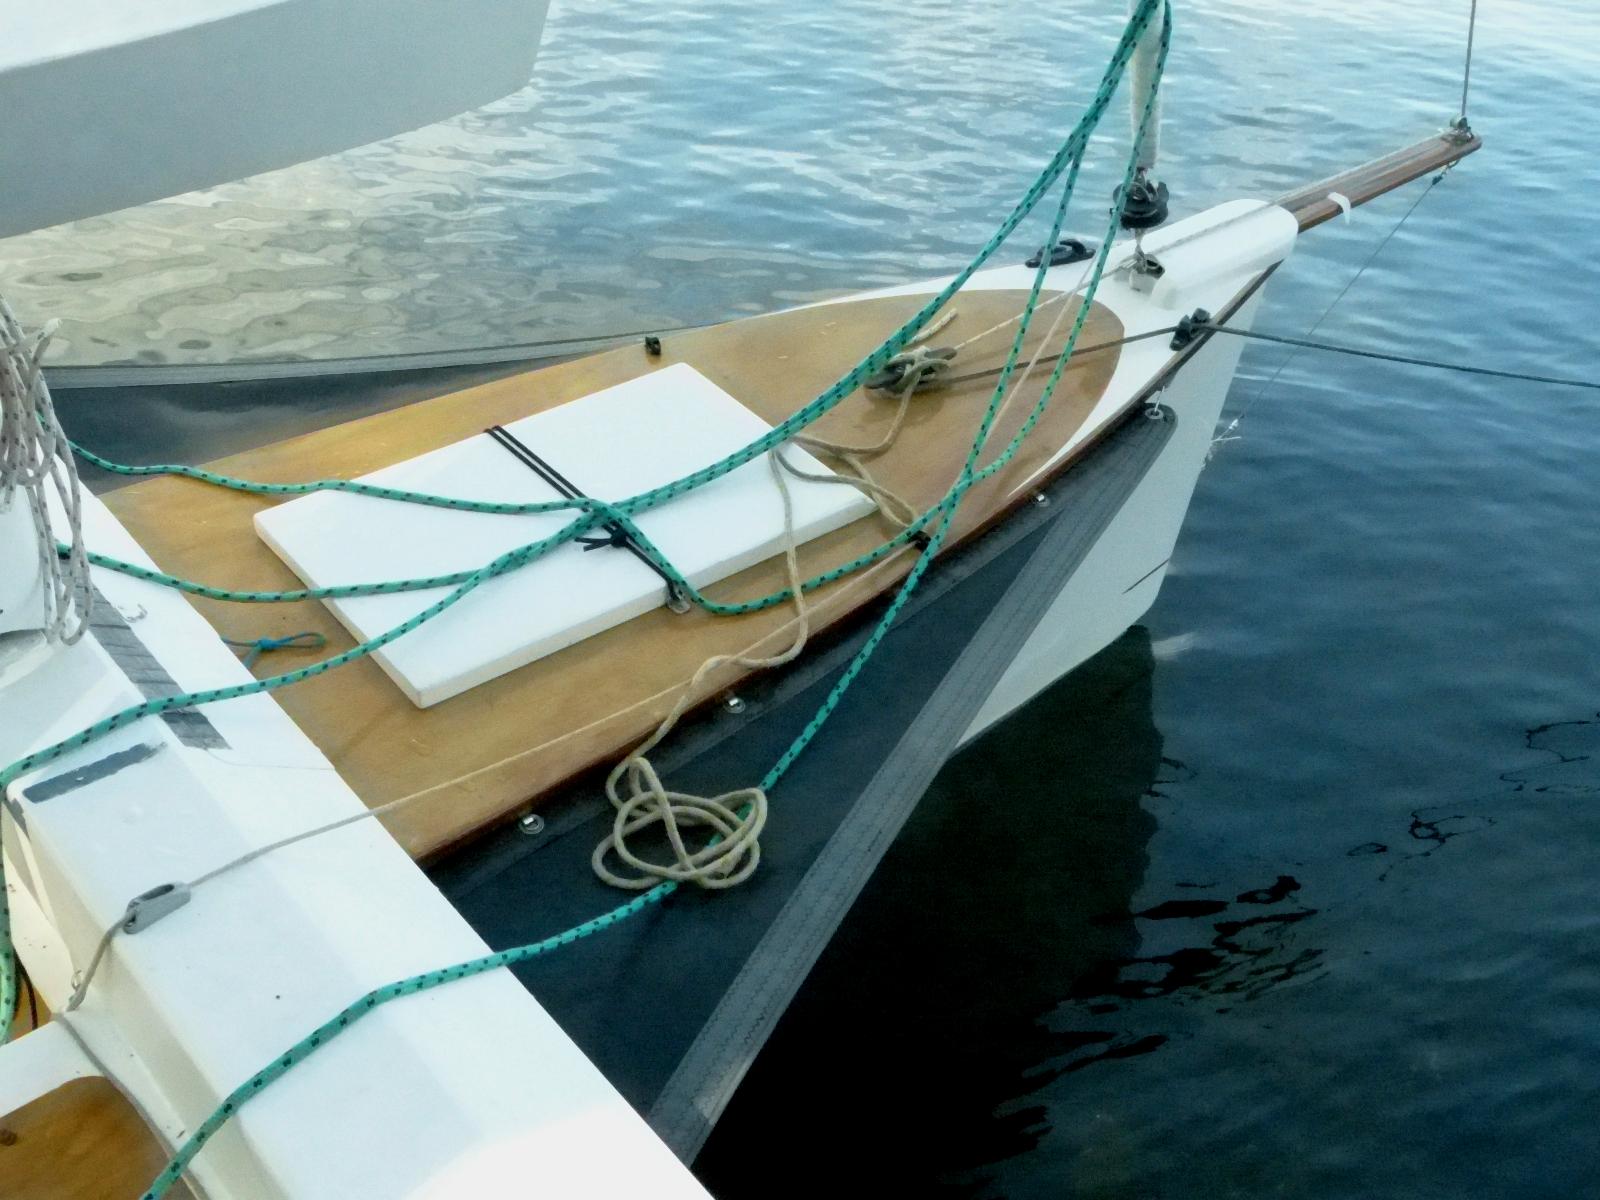
For the Foredeck, I have found just a snug fitting hatch with only a 20mm coaming quite adequate without any gaskets. As long as the hatch sides nearly touch the deck and the forward edge just touches it and is sloped, any water pressure will further press it down ... but always hook the shockcord loop over deck-mounted retaining hooks on each side. The hatch deck-framing is of lightweight cedar but with a 10mm strip of mahogany bonded to the lower edge with a UNI fiberglass layer below that. This makes for a strong but lightweight beam, though if walking on the deck, I still advise walking near the gunwale to not risk locally overloading the lightweight structure. 200lbs on 10 sqin is a high local load and needs to be respected .... far more than any wave will apply.
The beams are supported at the hull side in ply saddles. The hatch is made big enough for a nonmetallic icebox, which sits at the right height on a lightweight shelf, resting on the existing main hull stringer each side.
 The final deck hatch is for the Aft compartment. Initially, and still ok for merely day sailing, I only installed a round 10” hatch aft of the mainsheet track .. mostly to discourage users from placing weight in the stern … something that degrades performance for most sailing. But for any overnight cruising, this is such a large and useful space to store food and water, that a more accessible hatch was needed,
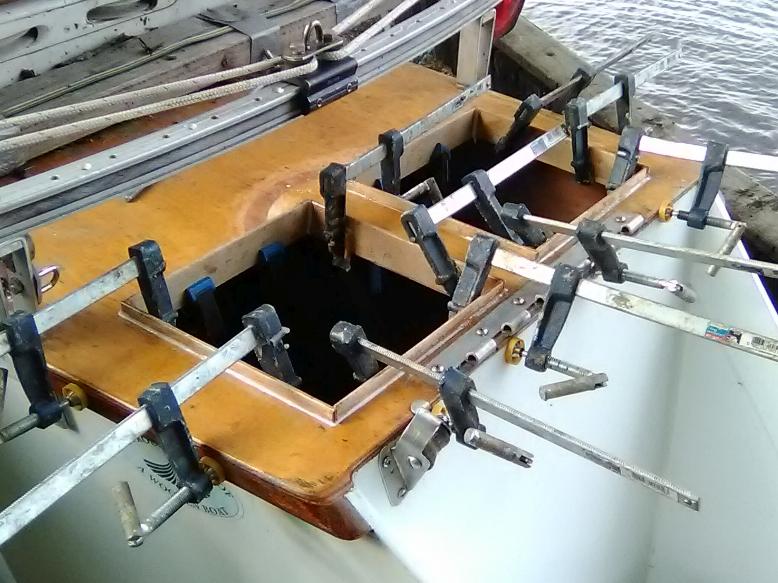
First I tried two square hatches aft of the track (see photo at left). While they allowed good access from outside the boat, they were not ‘comfortably easy’ to reach from the cockpit. 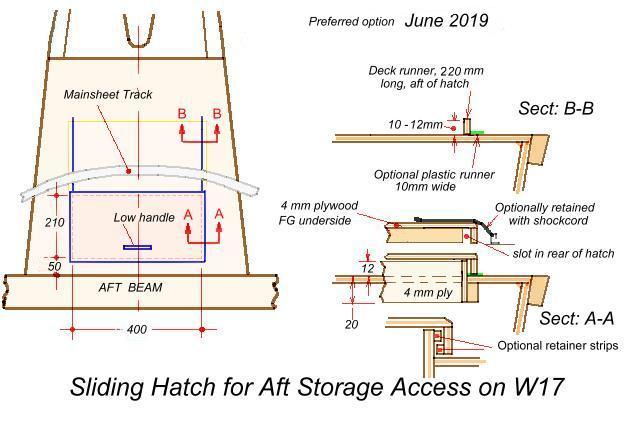
.
This final solution solves that and by pushing the hatch aft under the track, one does not have to find a place to stow the cover. I would still use a shockcord retention line (as for the Foredeck hatch) but the hatch is now always there and handy by just sliding it aft once the shockcord is released. Located aft of the cockpit, this location is only threatened by rain so it’s not worth compromising the design to be 100% watertight in my opinion*. So here is a sketch of my now preferred aft hatch arrangement.
[ *In the very worst scenario of a capsize, you'd want to flood this aft locker, to sink the stern and raise the bow to start a reverse cartwheel; aided by ropes and either two m/boats, or one m/boat and an anchor point ]
A THOUGHT : While you may already have hatches built into your boat, don't be shy about changing them. Its only a two week job part time and will be well worth the effort for the months and years of usage ahead. I am on my 3rd design now ;)
.
Beam Hatch for Tools
I would be amiss not to mention this great little hatch. As all W17 viewers will know, the main (forward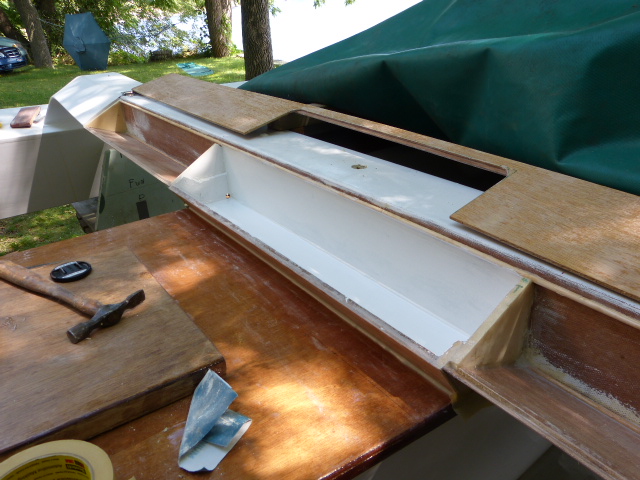 ) beam has a fairing that drives water under the beam and air over it. This leaves an air space inside 'though it's all sealed with the watertight main beam. However, for about 1 meter over the main deck, the top of this fairing is cut away and a hatch flap fitted in order to use this space for deck tools, spare hinge bolts, boom rolling crank, adjustable wrenches, small vice-grip (to extract latch bolts) and a screwdriver etc. It has proven extremely handy and although it's really not essential for sailing, it would be unforgiveable to not take advantage of this space and its placement, especially being as creating the little locker is so easy.
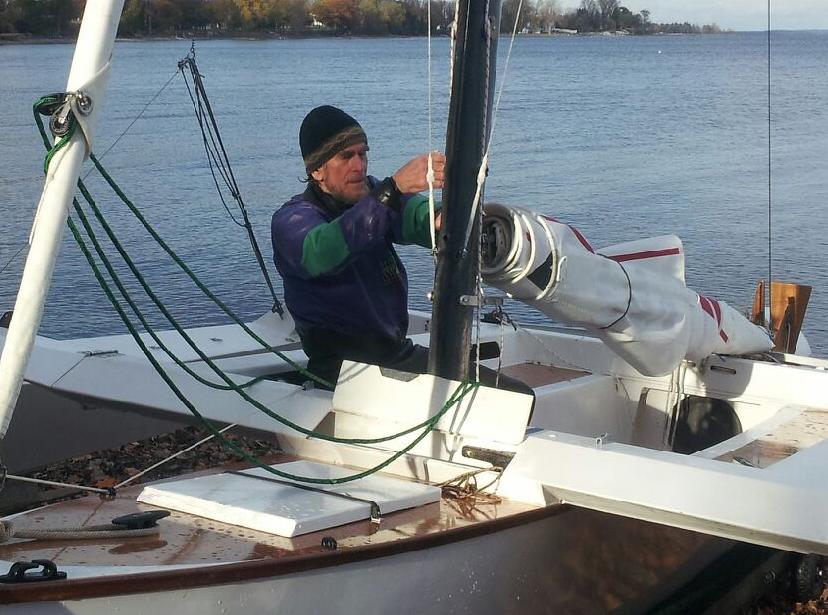
.
.
As the fairing is added, the centerpart is cut away as shown here. If its done neatly with a thin fine-toothed saw, the piece cut out will fit as the closing flap, with just some small edge bonded on for it to rest on. Here the locker interior is painted white. In the small triangular partition at each side, there is a drainage hole to the outside. It's every bit as handy as the glove compartment in your car ;)
.
.
.
MAINTENANCE TIP
While on the subject of hatches, I will mention that for winter storage, all deck plates in the amas 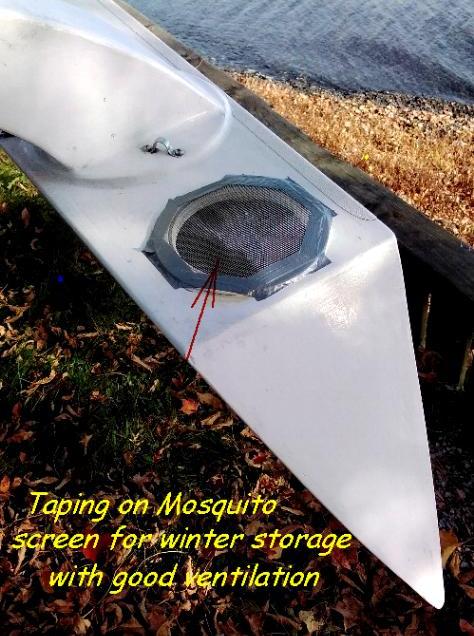 should be removed and with the boat inclined up at the bow, ANY water in the Amas can be drained aft so that it can be sponged out totally dry. When the boat has been sailed in salt water, I would first remove any salt water and then pour in a gallon (say 4 liters) of fresh water to wash out all the salt and then pump/sponge it all out so that it is entirely dry. Just before folding, aluminum mosquito screening should be securely taped over the openings to stop ants, bees, wasps, mice and the like, from entering. (see photo)
It’s worth mentioning that while salt water actually protects wood from rotting as fast as it does with fresh water, salt also holds more moisture and this makes the boat heavier. So the best solution for long life is to get the salt out and then wash out with fresh water before removing it all and then give such areas time to TOTALLY dry out naturally with good ventilation.
Repeatedly 'Sponging things DRY and providing excellent VENTILATION' is the best recipe for long life with a wood boat. I consider this even more important than epoxy coating for surfaces you have access to. One of the plywood boats I personally built in the UK 70 years ago, is still in good shape and being raced in the Vintage Race Class …. and that was built using resorcinol glue, well before epoxy became generally available, so I know that DRY & VENTILATED does work.
Mike, Nov 2023
.
.
"If you have any questions about trimarans, please use our question & comments form." —webmaster
"See the Copyright Information & Legal Disclaimer page for copyright info and use of ANY part of this text or article"